Raised Bed Covers by Big Fun Gardens
/
Since they were installed earlier this year, we have received numerous comments and questions about the raised bed covers on five of the beds at Garden for the Environment. These covers were designed and installed by Rino Bortolin and Trevor Goosen, who created beautiful, high quality, and extremely easy to use structures to protect our raised beds from our severe rodent issue in the area. Rino and Trevor have shared their thinking behind the structures and ideas for how to build your own. Here’s more detailed information about their design and process:
Design Considerations:
The idea for A-frame cages came from structures at the Point Reyes Community Garden. They were simple A-frame structures built with a combination of 2x2s and odds and ends of other lumber. The cage barrier was made out of plastic cloth mesh netting. The pliability of the plastic mesh cloth net allowed the lower portion of the cage to roll up and hook onto/rest on the large eye hooks two-thirds of the way up. Check 'em out:


When GFE asked us to create rodent barriers (exclusion baskets) for their raised beds, the Point Reyes’ A-frames came to mind. We used these models as an inspiration for our prototype, but wanted to incorporate our own elements of design. We wanted our structures to be elegant, durable, and extremely simple to open and close. When designing for a garden, the less hardware the better. Hardware either succumbs to rust, breaks, or does both. Gravity and geometry make a great substitute for any latch.
We began by building a full-size prototype with some scrap material. We built directly onto one of the raised beds to find our angles, and heights. The structures needed to be easy to open and close and secure in both positions with minimal hardware. They needed to be ergonomic with adequate workspace within which to dig, amend soil, and harvest veggies. The wood that we would use to build the frames had to be a balance of durability, stability and weight. We found some beautiful Alaskan Cedar 5/4 x 6”-inch boards and milled them down to 1¾-inch wide pieces. Efficient use of lumber (96” boards) also influenced our dimensions. Once the prototype was finished and we liked the look and function, we took it apart and used it as a template.
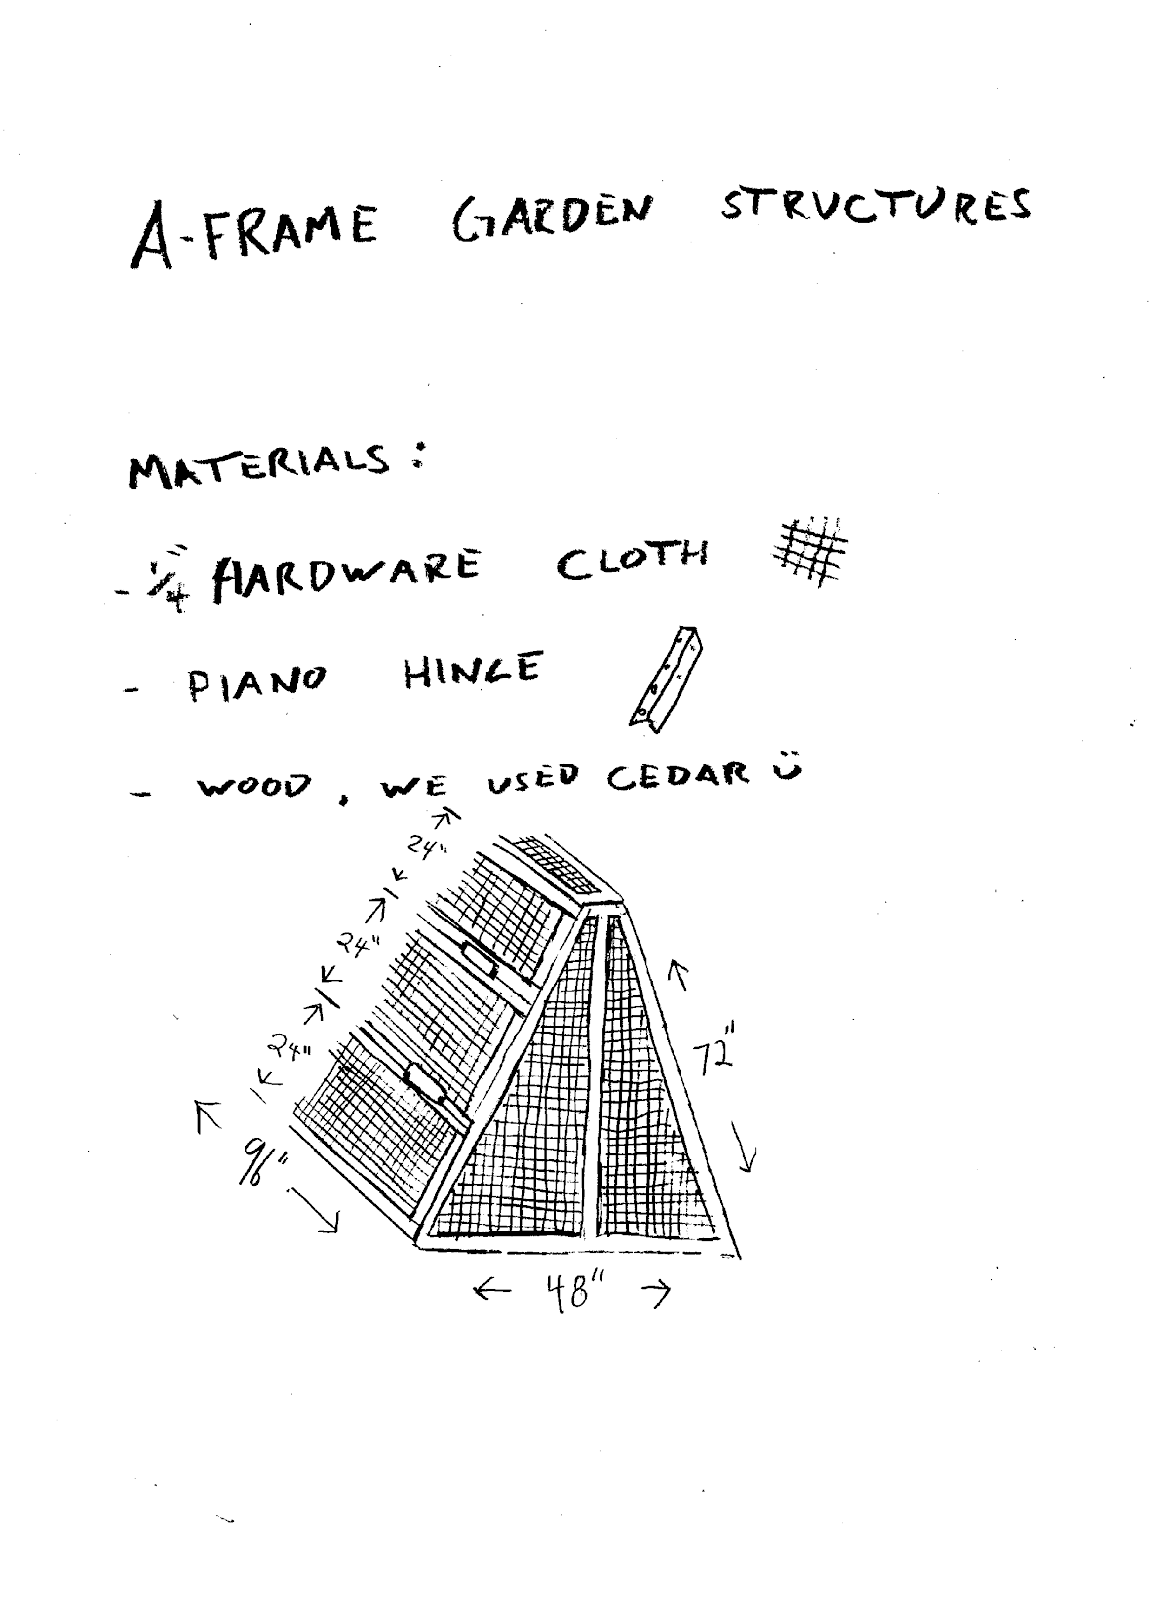
For the barrier, we wanted to stay away from plastic mesh, because rodents can chew through it, and it eventually breaks down in the sun and ends up in our environment. We opted for ¼ inch hardware cloth. We used ¼ inch to keep out the smallest of mice. Cutting hardware cloth is not super fun. Our preferred method is a cutoff wheel on an angle grinder. To minimize cuts and to save time we used 24-inch wide hardware cloth (it comes in various widths), which fit our doors perfectly.
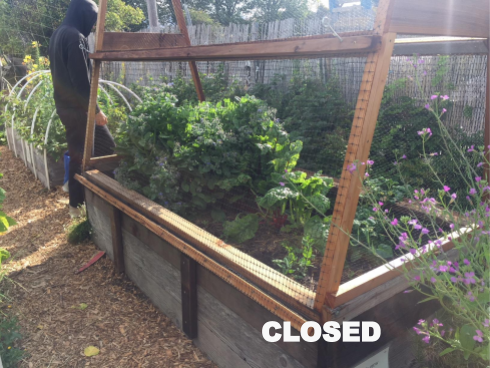
Our structures ended up being comprised of 24” tall by 96” wide panels joined by triangles. On the tall A-frame structures, it’s three panels per side – the top being fixed in place and the two below acting as the door.


The shorter, truncated A-frame structures are 96’’ wide and 48’’ tall, with two panels per side and a top panel. The two side panels hinge up and rest on the top panel.


If you’d like to build a version of these yourself, feel free to use these pictures to aid in your design.